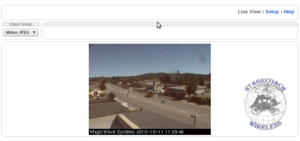
Setup axis210 with motion jpeg
From ZoneMinder Wiki
Revision as of 09:32, 23 October 2010 by Stagecoach (talk | contribs)
--stagecoach 15:32, 23 October 2010 (BST)
Go back to the How To pages...
Prerequisites
Setting up the Axis 210 camera is a simple ordeal with a few minimum requirements.
- IP address of camera.
- Username and password for the camera.
- Administrator access to Zone Minder.
Checking camera configuration
Before we can configure the camera within Zone Minder we must check to make sure the cameras internal settings are compatible.
- Check that the camera is connected and working by entering the cameras IP address. If you are successfull a web page with a live view of the camera should appear.
- From the cameras homepage the 'setup' link in the top right corner too the configuration page. You should be prompted to enter the username and password for the camera. On the settings page you should see a menu on the left hand side. Click through on 'Basic Configuration' followed by the 'Video & Image' links. Take a note of the resolution settings, as it will be needed later on.
Zone Minder configuration
After setting up the cameras configuration and verifying it works we need to tell Zone Minder how to display the camera.
- Login to Zone Minder.
- Click on the "Add New Monitor" link located at the bottom of the page, this will take you to the configuration page for adding a new camera.
- Open up the presets pop up by clicking on the 'presets' link (located on the top right hand corner of the page). From this page select with the drop down box the "Axis 210, 320x240,JPEG,With all Camera Options" and click save.
- On the general tab of the monitor configuration page we have the option to change the name of a monitor. It is recommended to give a name descriptive to where it is located or what it shows.
- Navigate to the "source" tab in the monitor configuration page and verify that the following fields have these settings
- Remote Host Name: root:<pw>@<ip-address>
- replace <pw> with the password you used to access the cameras configuration page, replace <ip-address> with the IP address you used to access the camera previously.
- Remote Host Path: /axis-cgi/mjpg/video.cgi
- replace the 320x240 with the width and height you set on the camera configuration.
- Capture Width: 320 and Capture Height: 240
- Once again replace these values with the values you set on the camera configuration page
- Remote Host Name: root:<pw>@<ip-address>
- Once you save the settings your camera should be listed on the homepage, If it is recording successfully the IP address will be green.

